A few years ago, I had to retire my 14 –year old refrigerator. It started with the door not sealing properly. Then the thermostat went bad with ice almost covering the entire freezer. Soon, the electric bill skyrocketed, so I assumed it was the old refrigerator. A few months later, the door needed to be welded because I can’t look inside without taking off the entire door. The repairs were quite expensive, so I decided to just buy a new one.
Fast forward, I was looking for a safe place for my seedlings. Placing my seedling trays outdoors had some disadvantages. One time, the dogs ripped the seedling trays apart when they decided to make it a toy. The sudden change in weather also affects the seedlings. It was better to let the plants grow inside the house where conditions were more controlled.
This is when I remembered the old refrigerator. I quickly set it up in a corner, cleaned it, and remove some rubbish. The door is no longer attached, but I won’t be needing the door anyway. I already had an idea on how to turn it into a grow box. Aside from the old ref, the materials needed are seedling trays, grow lights, a couple of hooks, light bulb sockets, pieces of wood, and some wires for the grow lights. The plan is to make this into a plant nursery to grow the seedlings until they are ready to be transplanted. By placing the seedlings indoors, inside an old refrigerator, the temperature and climate swings will not be so abrupt. In addition, by growing the plants from seeds indoors, they are protected from bugs, pests, and predators.
Daylight LED vs Grow Lights
My first attempt at growing plants inside a refrigerator was not so good. I didn’t have any grow lights around when I decided to turn my refrigerator into a grow box. What I had was some ordinary house Daylight LED rated at 12 watts. It had a color temperature of 6500K which gives it a cool, bluish tint.
The results were mixed, with some seeds not germinating at all. Some germinated but growth seemed to stop when the true leaves emerged. I’m not so sure about this, maybe something is wrong with my setup. You may have some success in using ordinary LEDs. Maybe it has something to do with the types of plants. I planted some bell peppers, asters, daisies, calendulas, lettuce, basil, tarragon, and thyme.
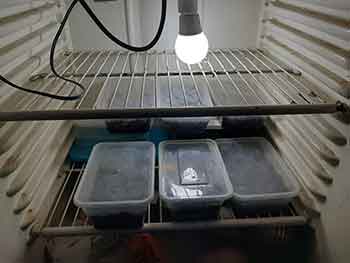
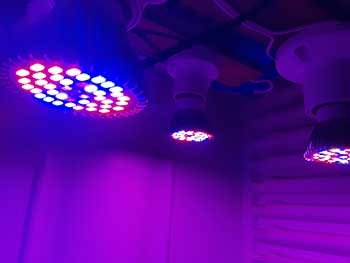
Out of all these plants, only the peppers achieved some moderate success. I transplanted them after 4 weeks and now they are growing healthily. After this failed attempt, I decided to invest in grow lights. I wanted to try it first, so I just ordered 3 cheap grow lights online and see if it works. 1 grow light was rated at 30 watts, and the other 2 are rated at 10 watts. All are full-spectrum grow lights.
Installing the Grow Lights
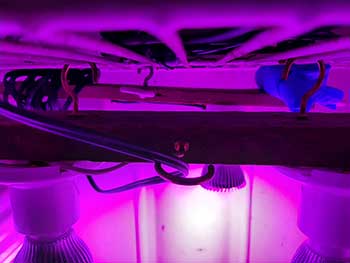
To install the grow lights inside the refrigerator, I bought some LED light sockets from a hardware store, along with some wires and a male plug. I also wanted it to be mobile and not attached permanently, so I got some hooks so I can just hang it on the refrigerator shelves. In short, I had to do some DIY stuff to assemble the lights. I’m fine with this, in fact, I enjoy doing DIY stuff all the time. Although maybe for some, it may be more practical to buy a complete grow light setup with all the wires and stuff.
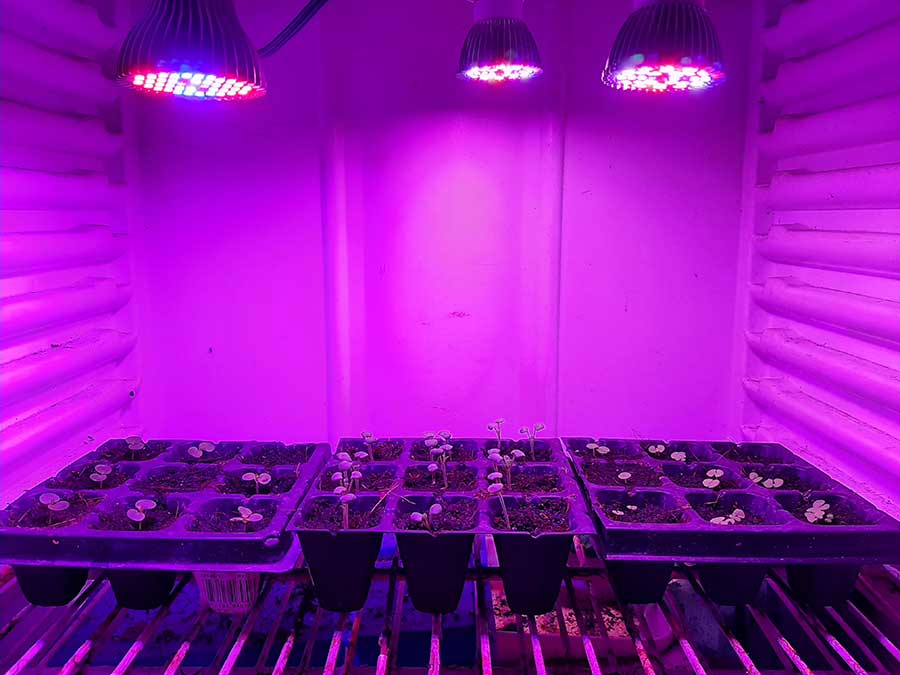
I had to find some slab of wood and cut it just enough to fit in the socket. Next, I attached the wires to the socket and the male plug in the other end. After that, I inserted the hooks for hanging. Once the assembly is done, I made sure that the lights will not stay too close to the plants. The distance from the plants has to be at least 6 inches. Luckily, the shelves are adjustable for most refs, so I placed one of the trays in the topmost position.

Preparing the Seedling Trays
For the seedling trays, I purchased a 72-hole seedling tray. Then I cut it to a 3x3 mini tray. After I measured the area inside the refrigerator, I found out that I can fit 6 mini trays. I like this setup since I enjoy doing experiments with my plants. For example, I want to know the effect of placing 3-week old sage seedlings under the sun for 2 hours. With this, I will just get the sage mini-tray without disturbing the other mini-trays. With 6 mini-trays, I can sow 6 types of seeds and observe the growth under the controlled conditions.


For the growing medium, I just use a commercially available growing medium which I bought on the internet. Sometimes, I also use a mix of coco peat and garden soil. I find the coco peat mixture ideal when you are ready to transplant the seedlings. With the coco peat, the individual seedlings can easily be removed from the tray by slowly pulling the stem without damaging the roots. Coco peat makes the soil porous which makes it easy for the roots to grow and they make a tight grip on the growing medium making it easy to remove from the tray.


Adding Some Garden Tech to the Old Refrigerator
Usually with the grow lights and seedling trays in place, the setup will do just fine. With the refrigerator door open or non-existent, it is easy to observe the growth of your plants, from germination to the emergence of true leaves. Every morning, you turn on the grow lights and enjoy the new growth. And in the evening, don’t forget to turn off the grow lights. Plants need sleep too. I like to keep the lights on for 14 hours. I’ve read somewhere that most seedlings need 14-16 hours of light to grow healthy.
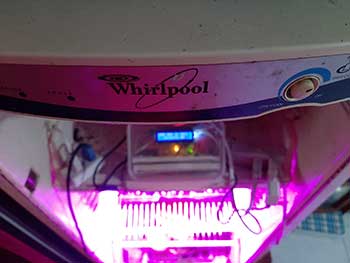
However, I like to tinker with stuff. On some days, you may forget to turn the lights on or off. I like this part to be automated. You can buy a timer for this and set the time when the grow lights turn on and when to turn off. I could have bought one, but since I have a little background in electronics and I also teach automation and robotics, why not make my own timer! Heck, I could even throw in a temperature and humidity sensor!
In making my timer, I used an Arduino microcontroller, LCD, digital temperature and humidity sensor, real-time clock, and relays. Next, after setting up the hardware, I turned to my laptop to encode the software part. After a few debugging, the code finally works and I uploaded it into my Arduino microcontroller. I hooked the device to an electrical outlet and it works! Buying a timer would have been easier but I enjoy doing it myself.
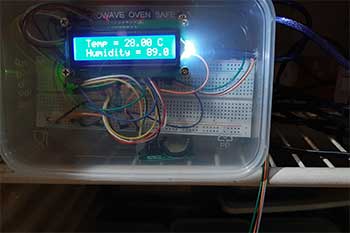
I set up the device to turn the grow lights on at 5 AM and turn it off at 7 PM. So now the light is constant and there is no need to worry about wind and rain, snow and storm. Bugs are also not a problem. Plants like it when the environment is constant in the early stages of their lives. However, eventually, they will outgrow the refrigerator and you will need to transfer to a new home.
Transferring from the Refrigerator to the Garden
When the plant grows around 4 true leaves, it is time for me to transfer them to a container or pot to be placed in my garden. In transplanting, I make sure to use the best potting mix. Sometimes I buy online and sometimes I make my own potting mix with coco peat, garden soil, and other soil amendments. I wrote an article about potting mixtures and you can read it here.
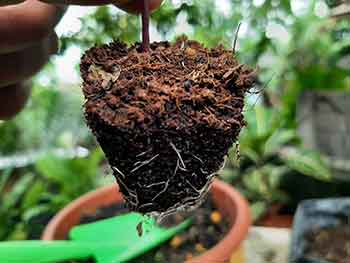
The process is fairly easy. Since I use coco peat, the seedlings can easily be pulled out from the tray. If not, I use a plastic spoon to pry out the seedling without disturbing the roots too much. Next, I drench the pot with my fermented plant juice organic fertilizer, although plain water is fine. You can read about my fermented plant juice fertilizer here.
I then place it on a shady area so that it doesn’t receive direct sunlight, but still gets enough brightness. This step gives time for the plants to acclimate to the “real world”. After 1 week, they are ready to be placed anywhere in my garden.
After transplanting, I now have some space inside the refrigerator so I plant some seeds again, ready to transplant in a month or two.